Client Management
How to Create New Accounts
1. To create a new account, go to Accounts in the sidebar.
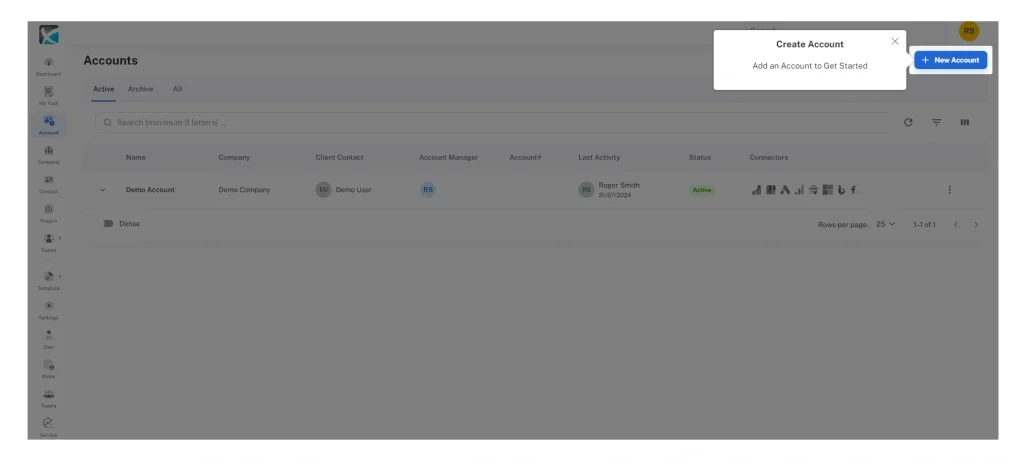
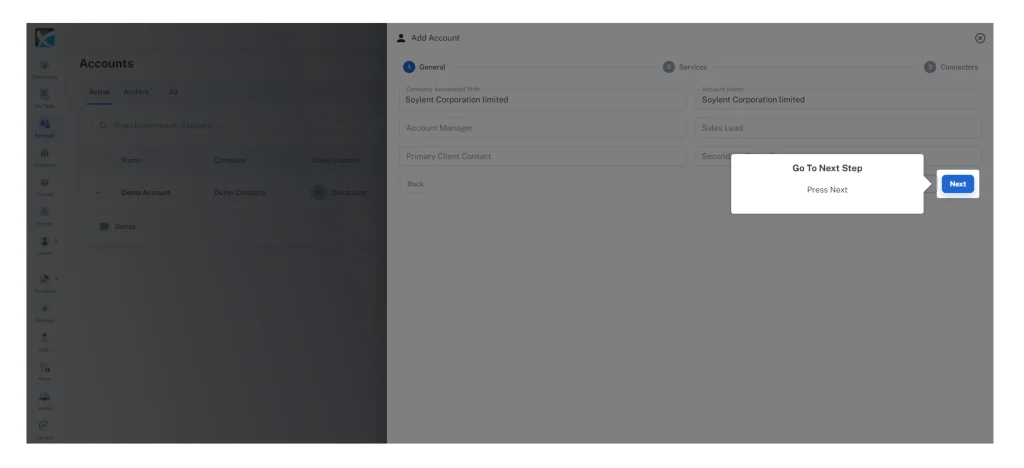
2. Click New Account and start filling in the new account information.
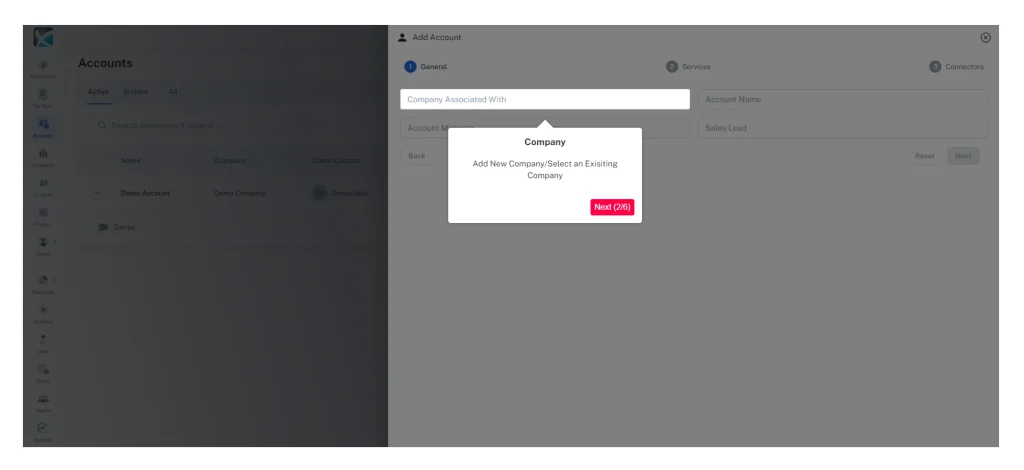
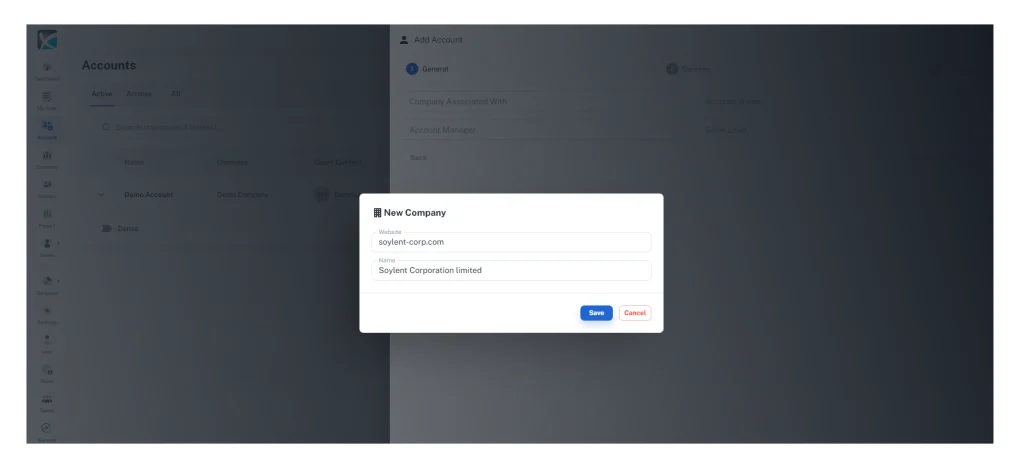
3. To create a new account, you will first need to assign the account to a company. You can either search existing companies or manually add a new company.
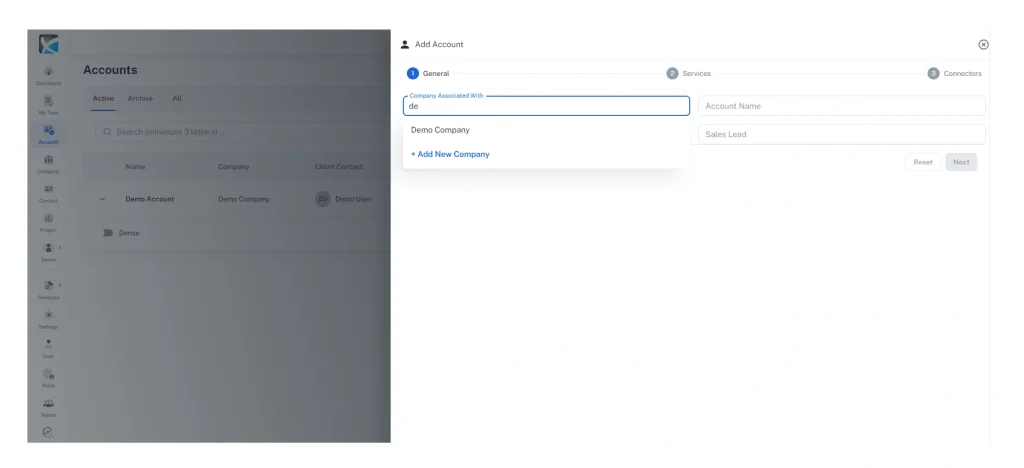
4. To create a new company, simply add the website and name of the company that you wish to add. You can later add other company details by going to Companies in the sidebar and selecting the one you want to edit.
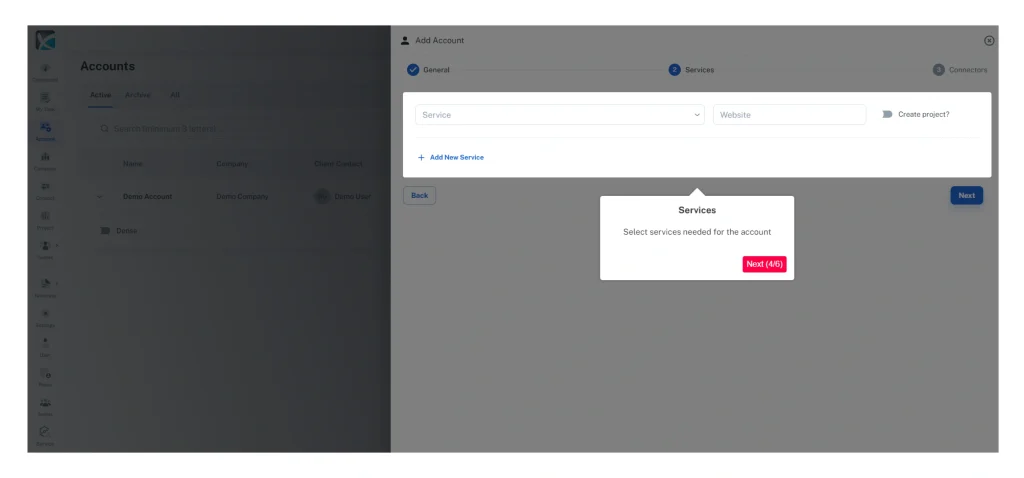
5. Select the services relevant to this client/account from the drop down list. Add additional services as necessary. You can edit/add/remove services in the Services section in the sidebar or in settings.
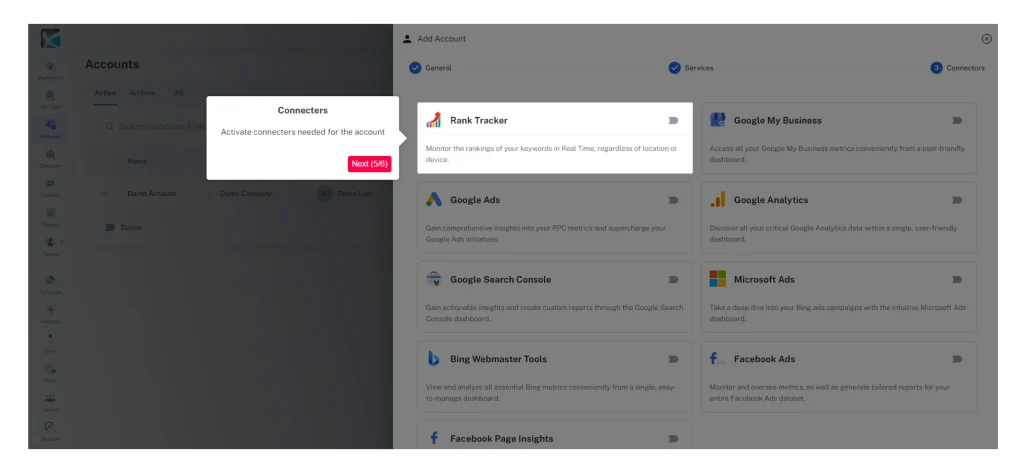
6. Enable the connectors you wish to activate for this account. This can also be updated later after the creation of the account from Account Overview.
7. You have now successfully created an account. You can now access the dashboard for this account and start exploring and enabling further features.
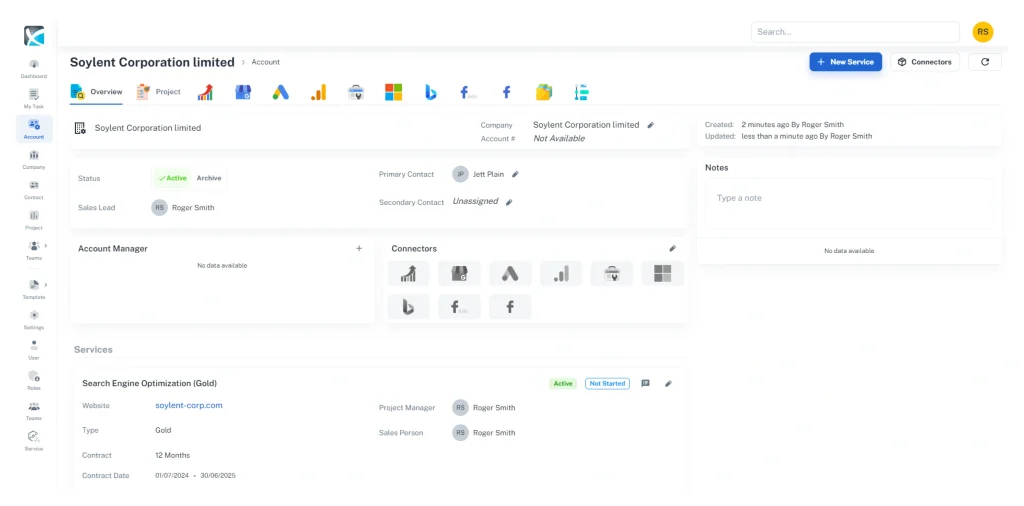
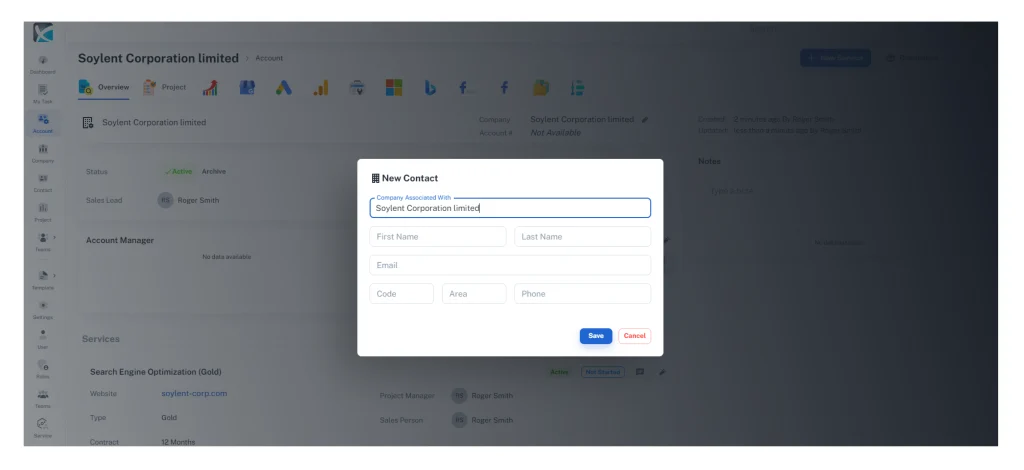
8. To add client contacts associated with this account, click the pencil icon to the right of Primary Contact or Secondary Contact and select the contact from the drop-down list. To edit contact details, click on the contact name. You will then be able to add or edit email addresses, phone numbers, addresses and other information.
How to Archive Clients
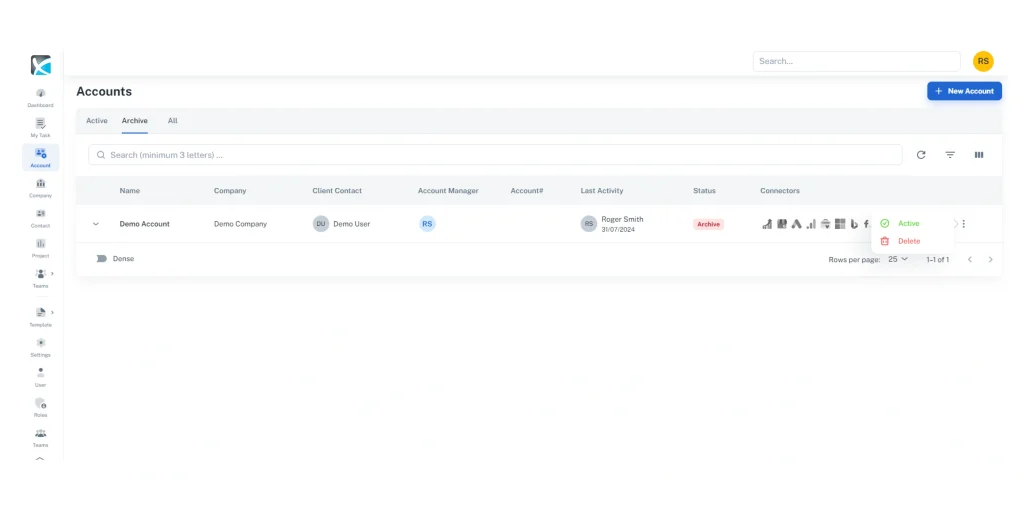
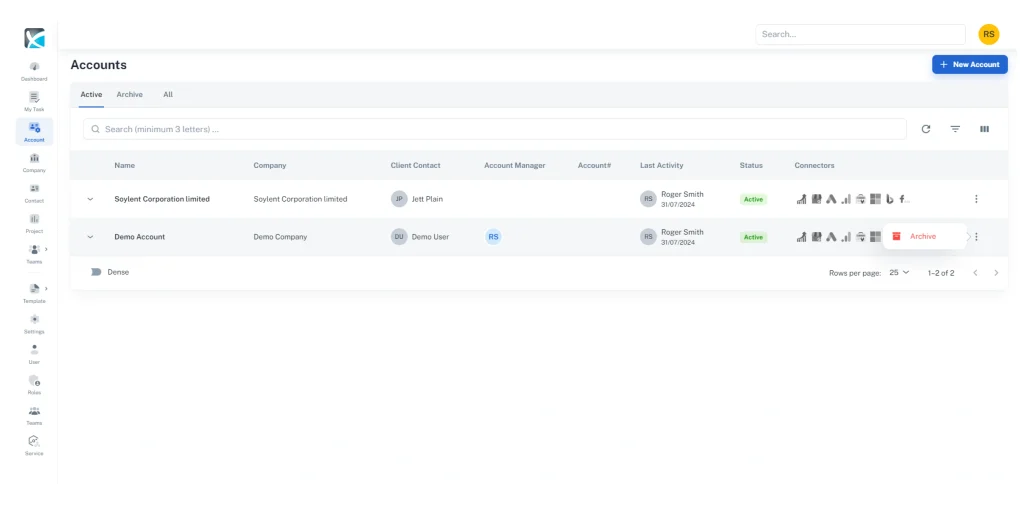
1. To archive clients, go to Accounts in the sidebar.
2. Click the 3-dot menu to the right of the client name and select Archive. Please note that archived accounts are still included in the total accounts used until the account data is deleted.
3. To delete the account, go to archived accounts, click the 3-dot menu to the right of the account you want to delete, and select Delete. This will permanently remove all information associated with that account.