User Roles & Permissions
User roles and permissions
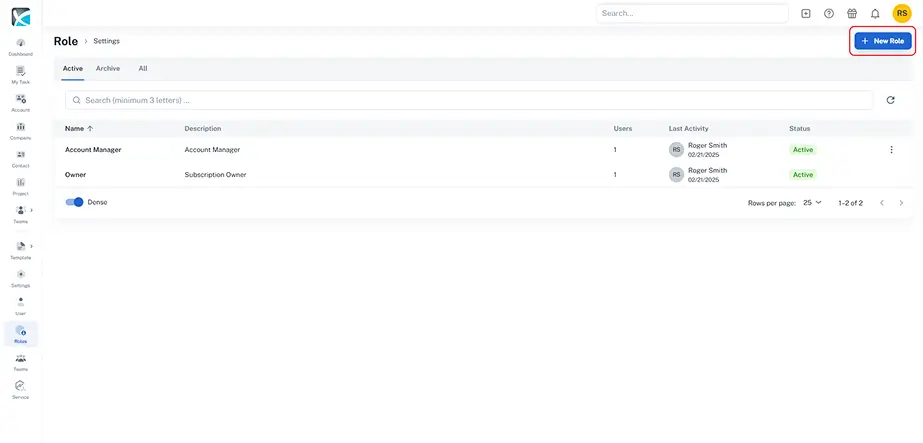
How to Create and Assign Roles
1. To create a role, first go to Roles in the sidebar. Then click New Role in the top right corner of the screen.
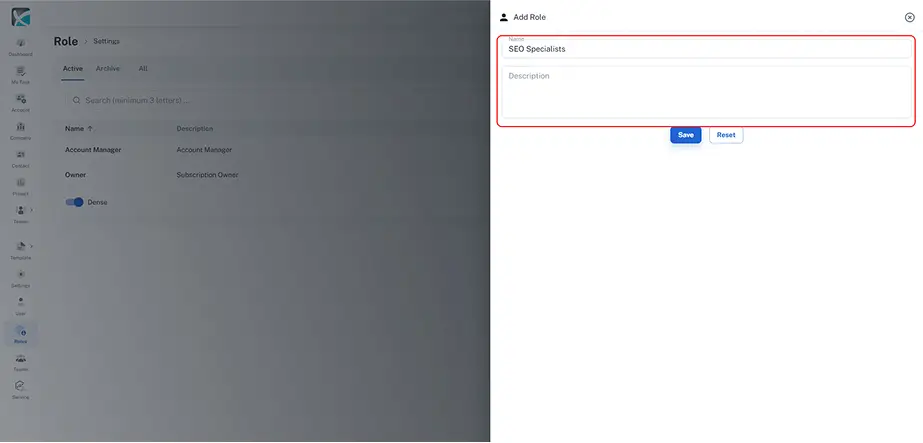
2. Name the role, write a short description, and click Save.
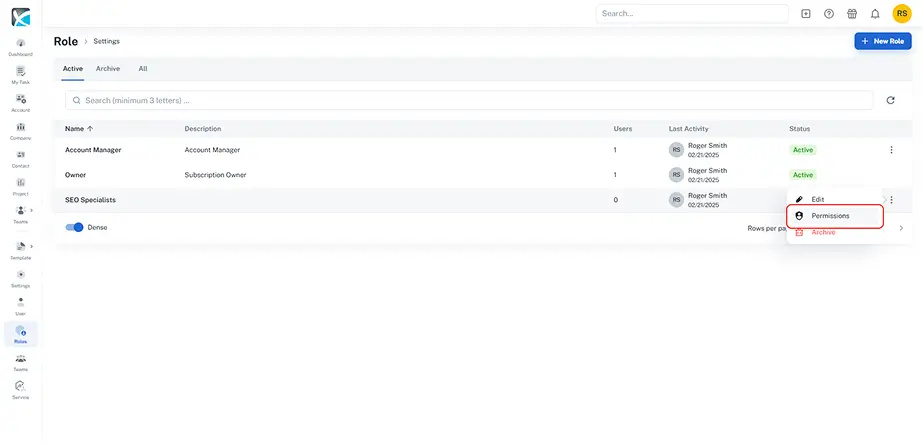
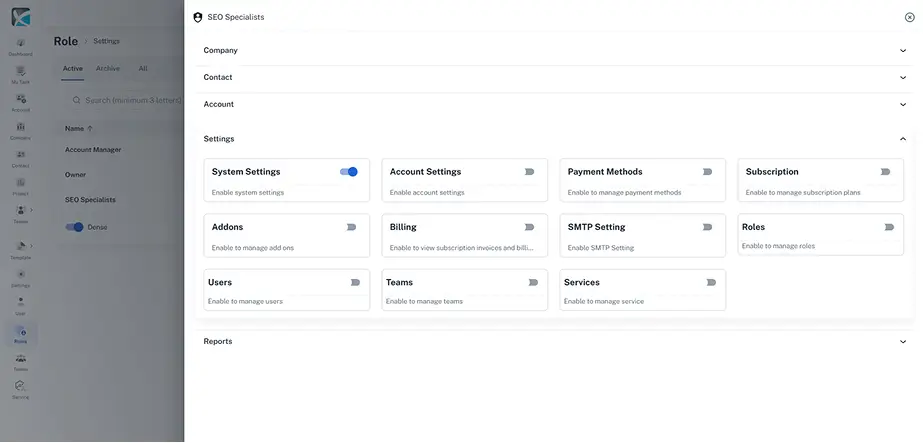
3. Once you’ve created the new role, it’s time to set the permissions. This will determine what users assigned to this role will be able to view and edit within DAXRM. To set the permissions, click on the 3-dot menu to the right of the newly created role.
4. You can expand each of the permissions categories and toggle the permissions on or off depending on the levels of access required for the role. Once you have set the permissions, you can simply close this window to save the settings.
5. With the role created and the permissions set, you can now assign this role to the relevant users. To do this, go to User in the sidebar.
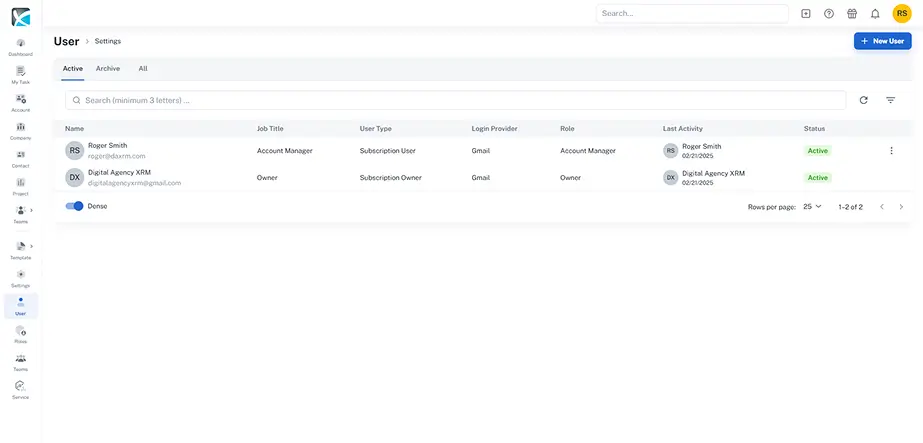
6. Use the search bar to find the relevant user. Then click on that user’s name.
To assign a role, click on the role name in the top right and select from the dropdown menu.
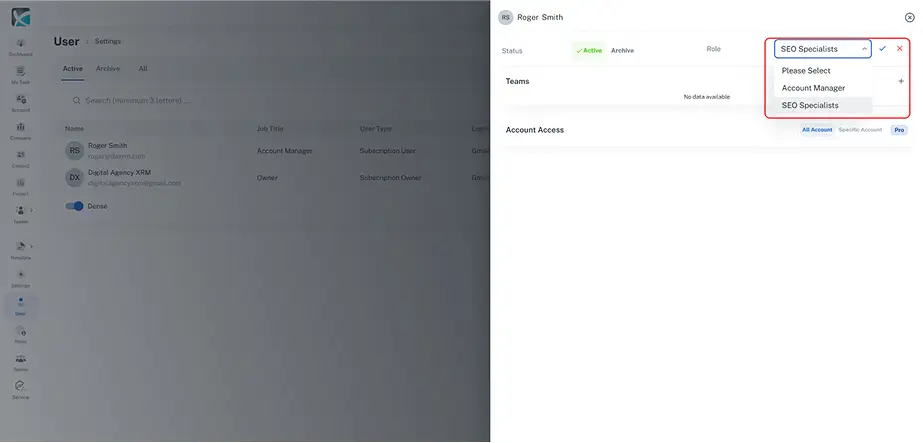
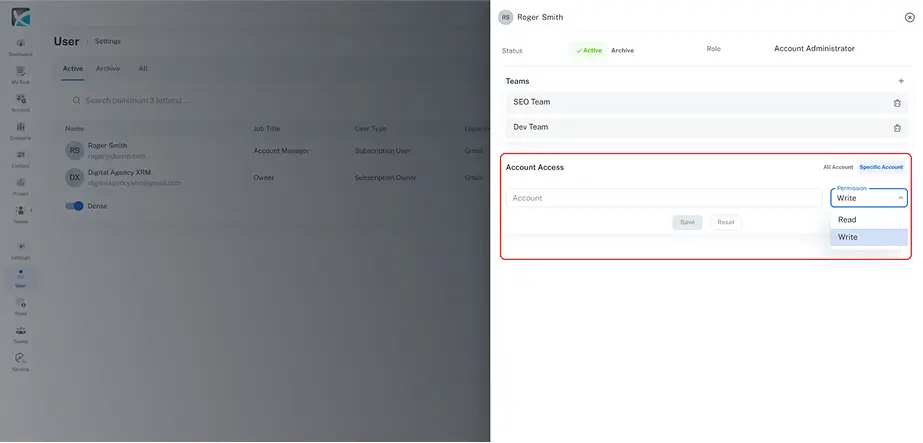
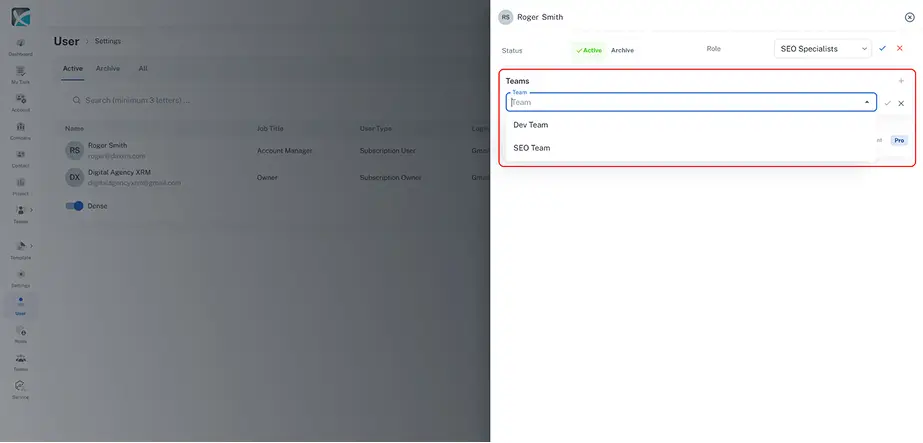
7. At this stage, you can also assign this user to any teams that are relevant to the assigned role. Click the + sign to the right of Teams and select a team from the dropdown list. You can add as many teams as necessary.
8. Once you have assigned teams, you can determine the level of account access that you want this user to have. Click on All Account will allow read and write access across all DAXRM accounts.
You can also set specific account access for users who only require access to a limited number of accounts. To do this, click the Specific Account button. Search for the account name and set read or write access. You can do this for as many accounts as necessary.
Finally, click Save.